This is an old revision of the document!
等待修复 此页面没有被翻译完全。请帮助翻译本页。
(当全文翻译完时请移除这个段落。)
制作一个自定义列车资源包
这个页面会教你如何去创建一个自定义的列车资源包。
资源包制作建议使用Windows 10 21H1及以上,以下版本建议使用第三方软件打包zip。
您可以观看视频来制作资源包(需要科学上网): https://www.youtube.com/watch?v=QH1O-y6kPSk
教程
- 进入你的“.minecraft”文件夹

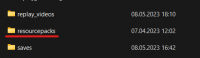
- 找到“resourcepacks”文件夹并进入
- 新建一个文件夹,文件夹名称取决于你要给资源包取什么名

- 进入文件夹后,再新建一个文件夹,名称为
assets. - 粘贴或新建制作一个名叫“pack.png”的图片文件,这是可选的,目的是为资源包制作图标。图片分辨率必须小于128×128。
- 下载一个示范“pack.mcmeta”,这个文件是必需的,否则Minecraft无法读取。你也可以新建一个文本文档取名为“pack.mcmeta”,输入以下代码:
- pack.mcmeta
{
    "pack": {
        "description": "put your pack description here",
        "pack_format": 9,
    }
}
The pack format is what version of Minecraft the pack is for. If you are only adding MTR models or textures, this is not important then.
then create a new folder named MTR in the assets folder. Create a text file inside the folder named mtr_custom_resources.json
copy, paste & edit some of the values. The main code is here:
for one train:
- mtr_custom_resources.json
{
	"custom_trains": {
		"{Base_Train_Name_here}": {
			"name": "My Custom Train Name",
			"color": "#66CCFF",
			"base_train_type": "sp1900",
			"texture_id": "mtr:{FOLDERNAME}/{TEXTURENAME}.png"

		}
	}
}
for more than one (here for 2 trains)
- mtr_custom_resources.json
{
	"custom_trains": {
		"{Base_Train_Name_here}": {
			"name": "Another train name here",
			"color": "66CCFF",
			"base_train_type": "sp1900",
			"texture_id": "mtr:{FOLDERNAME}/{TEXTURENAME}.png"

		},

		"{Base_Train_Name_here}": {
			"name": "Another train name here",
			"color": "66CCFF",
			"base_train_type": "sp1900",
			"texture_id": "mtr:{FOLDERNAME}/{TEXTURENAME}.png"

		}
	}
}
Also for more help check out the MTR Github Wiki https://github.com/jonafanho/Minecraft-Transit-Railway/wiki/Trains, https://github.com/jonafanho/Minecraft-Transit-Railway/wiki/Adding-Custom-Resources
Json explanation:
- “name”: The name that MTR shows in the train picker.*
- “color”: The color that MTR shows in the train picker.
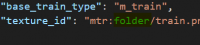
- “base_train_type”: The type of the retextured train*
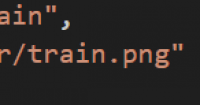
- “texture_id”: The custom texture that will display when train has been spawned.*
*required
How to edit the textures?
- Download Paint 3D [Because it supports transparency]
- go to https://github.com/jonafanho/Minecraft-Transit-Railway/tree/master/resources/common/normal/assets/mtr/textures/entity and download you´r wanted train texture
- open Paint 3D and select Open
- go to you´r folder where you have saved the texture
- start editing
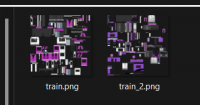
- after painting put the textures into you´r image folder in the RP
- and you´re done!
And you are done with the basics! you can now download the example resource pack!