This is an old revision of the document!
Table of Contents
 This page is not fully translated, yet. Please help completing the translation.
(remove this paragraph once the translation is finished)
Приступая к работе
Версия 3.0 мода Minecraft Transit Railway придумала заново концепт железнодорожных систем в Minecraft. Вместо использования традиционных вагонеток, центральная панель управления всё время контролирует, где находятся поезда. Лагающие сущности, неактивные поезда в выгруженных чанках и перегруженные сервера теперь в прошлом.
Панели управления теперь - главная часть мода. При помощи них можно добавлять, перемещать и удалять станции, маршруты и депо.
Поезда больше не являются сущностями или “перекрашенными вагонетками”. Вместо этого, они теперь часть данных мира с симуляцией позиции каждого из них на каждом тике сервера. Это обходит множество ненужных расчётов позиции, скорости и коллизии сущностей и позволяет поездам двигаться даже за пределами загруженных чанков. Это также означает, что предметы для спавна теперь отсутствуют, так как поезда передвигаются по заданному игроком расписанию. Начиная с версии мода 3.0.0-beta-5, поезда больше не используют рельсы из ванильного Minecraft.
Видео-инструкции
Для подробных видео-инструкций, пожалуйста перейдите к этому плейлисту.
Создание рельс
Это основные шаги для создания рельс. Для расширенной информации перейдите на эту страницу.
- Установите rail node на землю.
- Пройдите впердёт хотя бы несколько блоков и установите второй rail node.
- Возьмите любой rail connector. Держа rail connector в руке, кликните правой кнопкой мыши по любому из rail node. Rail connector должен начать мерчать в слоте инвентаря.
- Всё ещё держа rail connector в руке, кликните правой кнопкой мыши по второму rail node. Рельы должны появиться между двумя rail node.
Постройка своей первой железной дороги
Платформы
Платформа - это часть рельс, где поезда останавливаются, чтобы подобрать пассажиров.
- Сделайте рельсы для платформы, следуя шагам выше (Описанное в Создание рельс с использованием предмета platform rail connector)
- Найдите любое другое место и сделается другие рельсы для платформы, не соединённые с предыдущими. Постарайтесь сделать их такой же длины. Это будет второй платфоромй для поездов.
- Соедините два отрезка рельс любым другим коннектором (кроме platform и siding connector). Можно использовать дополнительно ещё rail node, если потребуется.
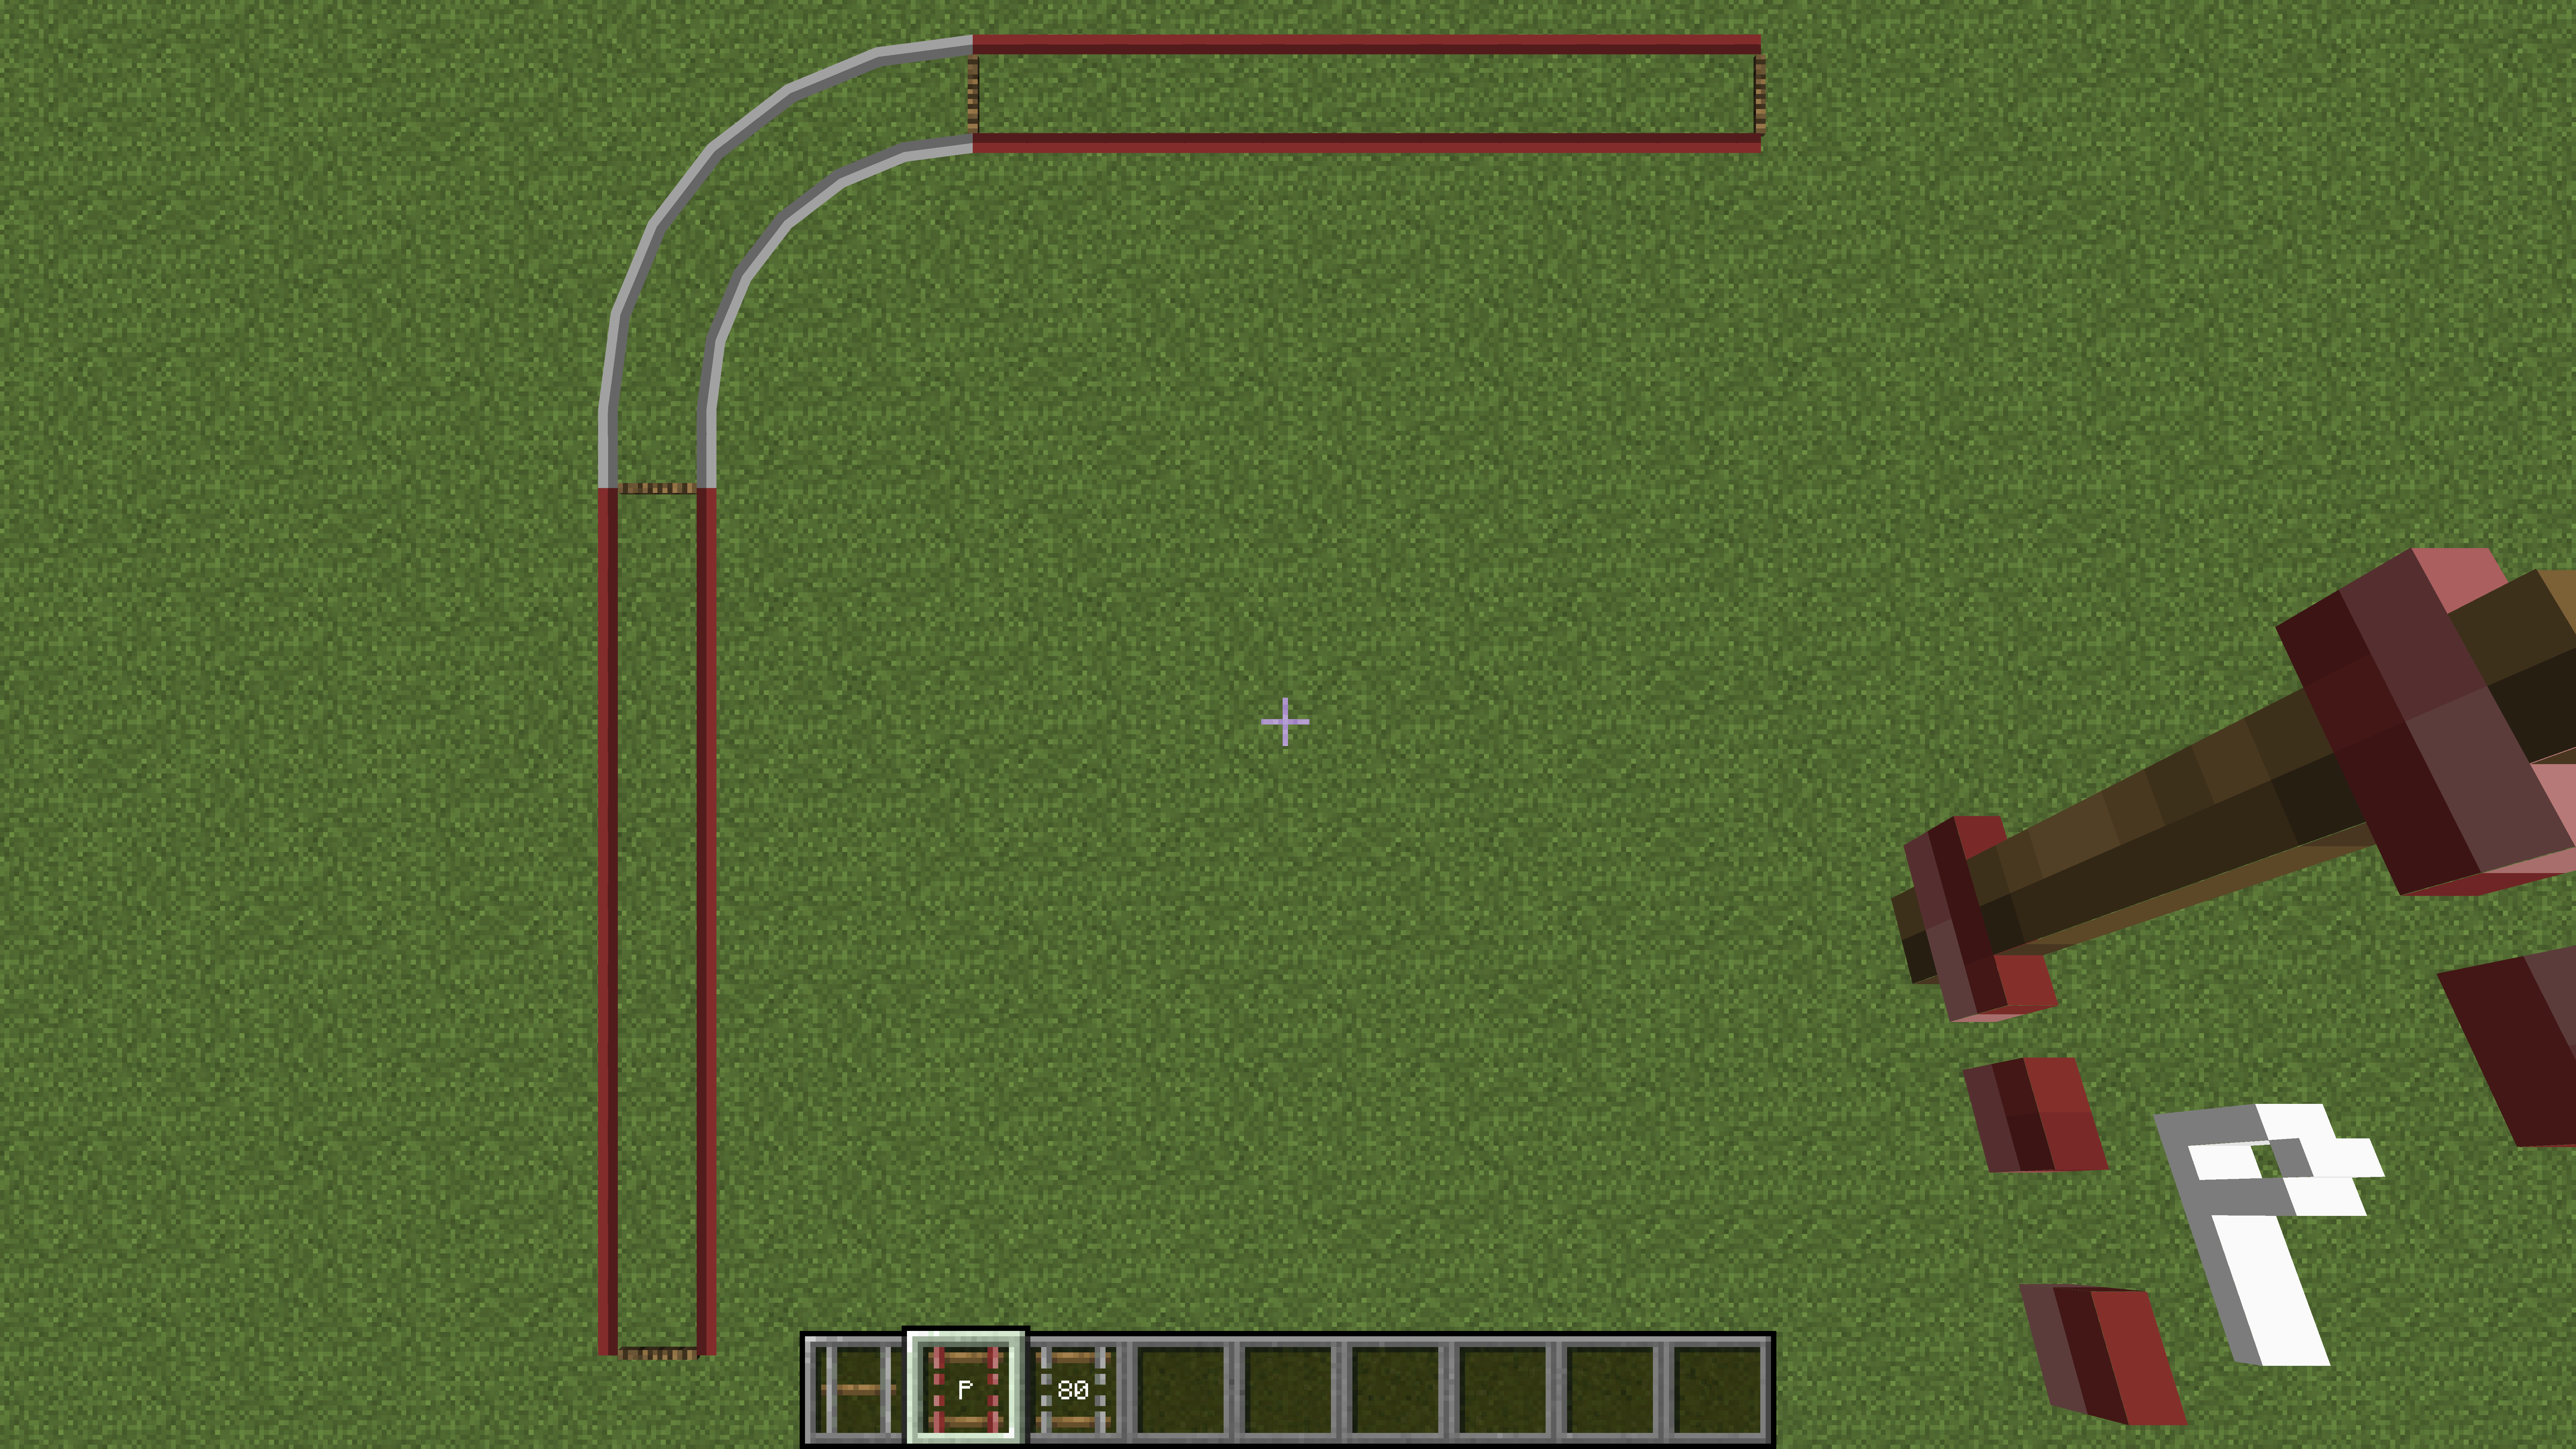
Пример двух рельс для платформ, соединённых другим типом рельс.
Stations
A station is a rectangular area marked in the world. Each station should completely cover one or more platforms.
- Obtain the railway dashboard item and right click to open it.
- The menu on the left has three tabs:
Stations,Routes, andDepots.- The
Stationstab is selected by default. - The map on the right shows the current world.
- The blue dot with a white outline marks the current player location.
- Platforms are bright white on the map.
- Click and drag on the map to move it.
- Use the mouse scroll wheel or the
+or-buttons on the bottom right to zoom.
- Zoom and move around the map to find the first platform that was built.
- On the
Stationstab, click on the button at the bottom calledAdd Station. - The map is now in edit mode. Left click and drag to draw a rectangular station area over the first platform.
- If a mistake was made, just click and drag again. The previously defined station area will disappear.
- At the text box on the bottom left, type in a name for the new station. Use the
|character to separate different languages, for example第一城|City One. - Click
Donewhen finished. - Move around the map to find the second platform that was built.
- Click on the
Add Stationbutton again. Draw another rectangular station area, covering the second platform. Type in a name for the second station. - Click
Donewhen finished.
Two example stations, Northgate and East Green Lake, have been created in the railway dashboard.
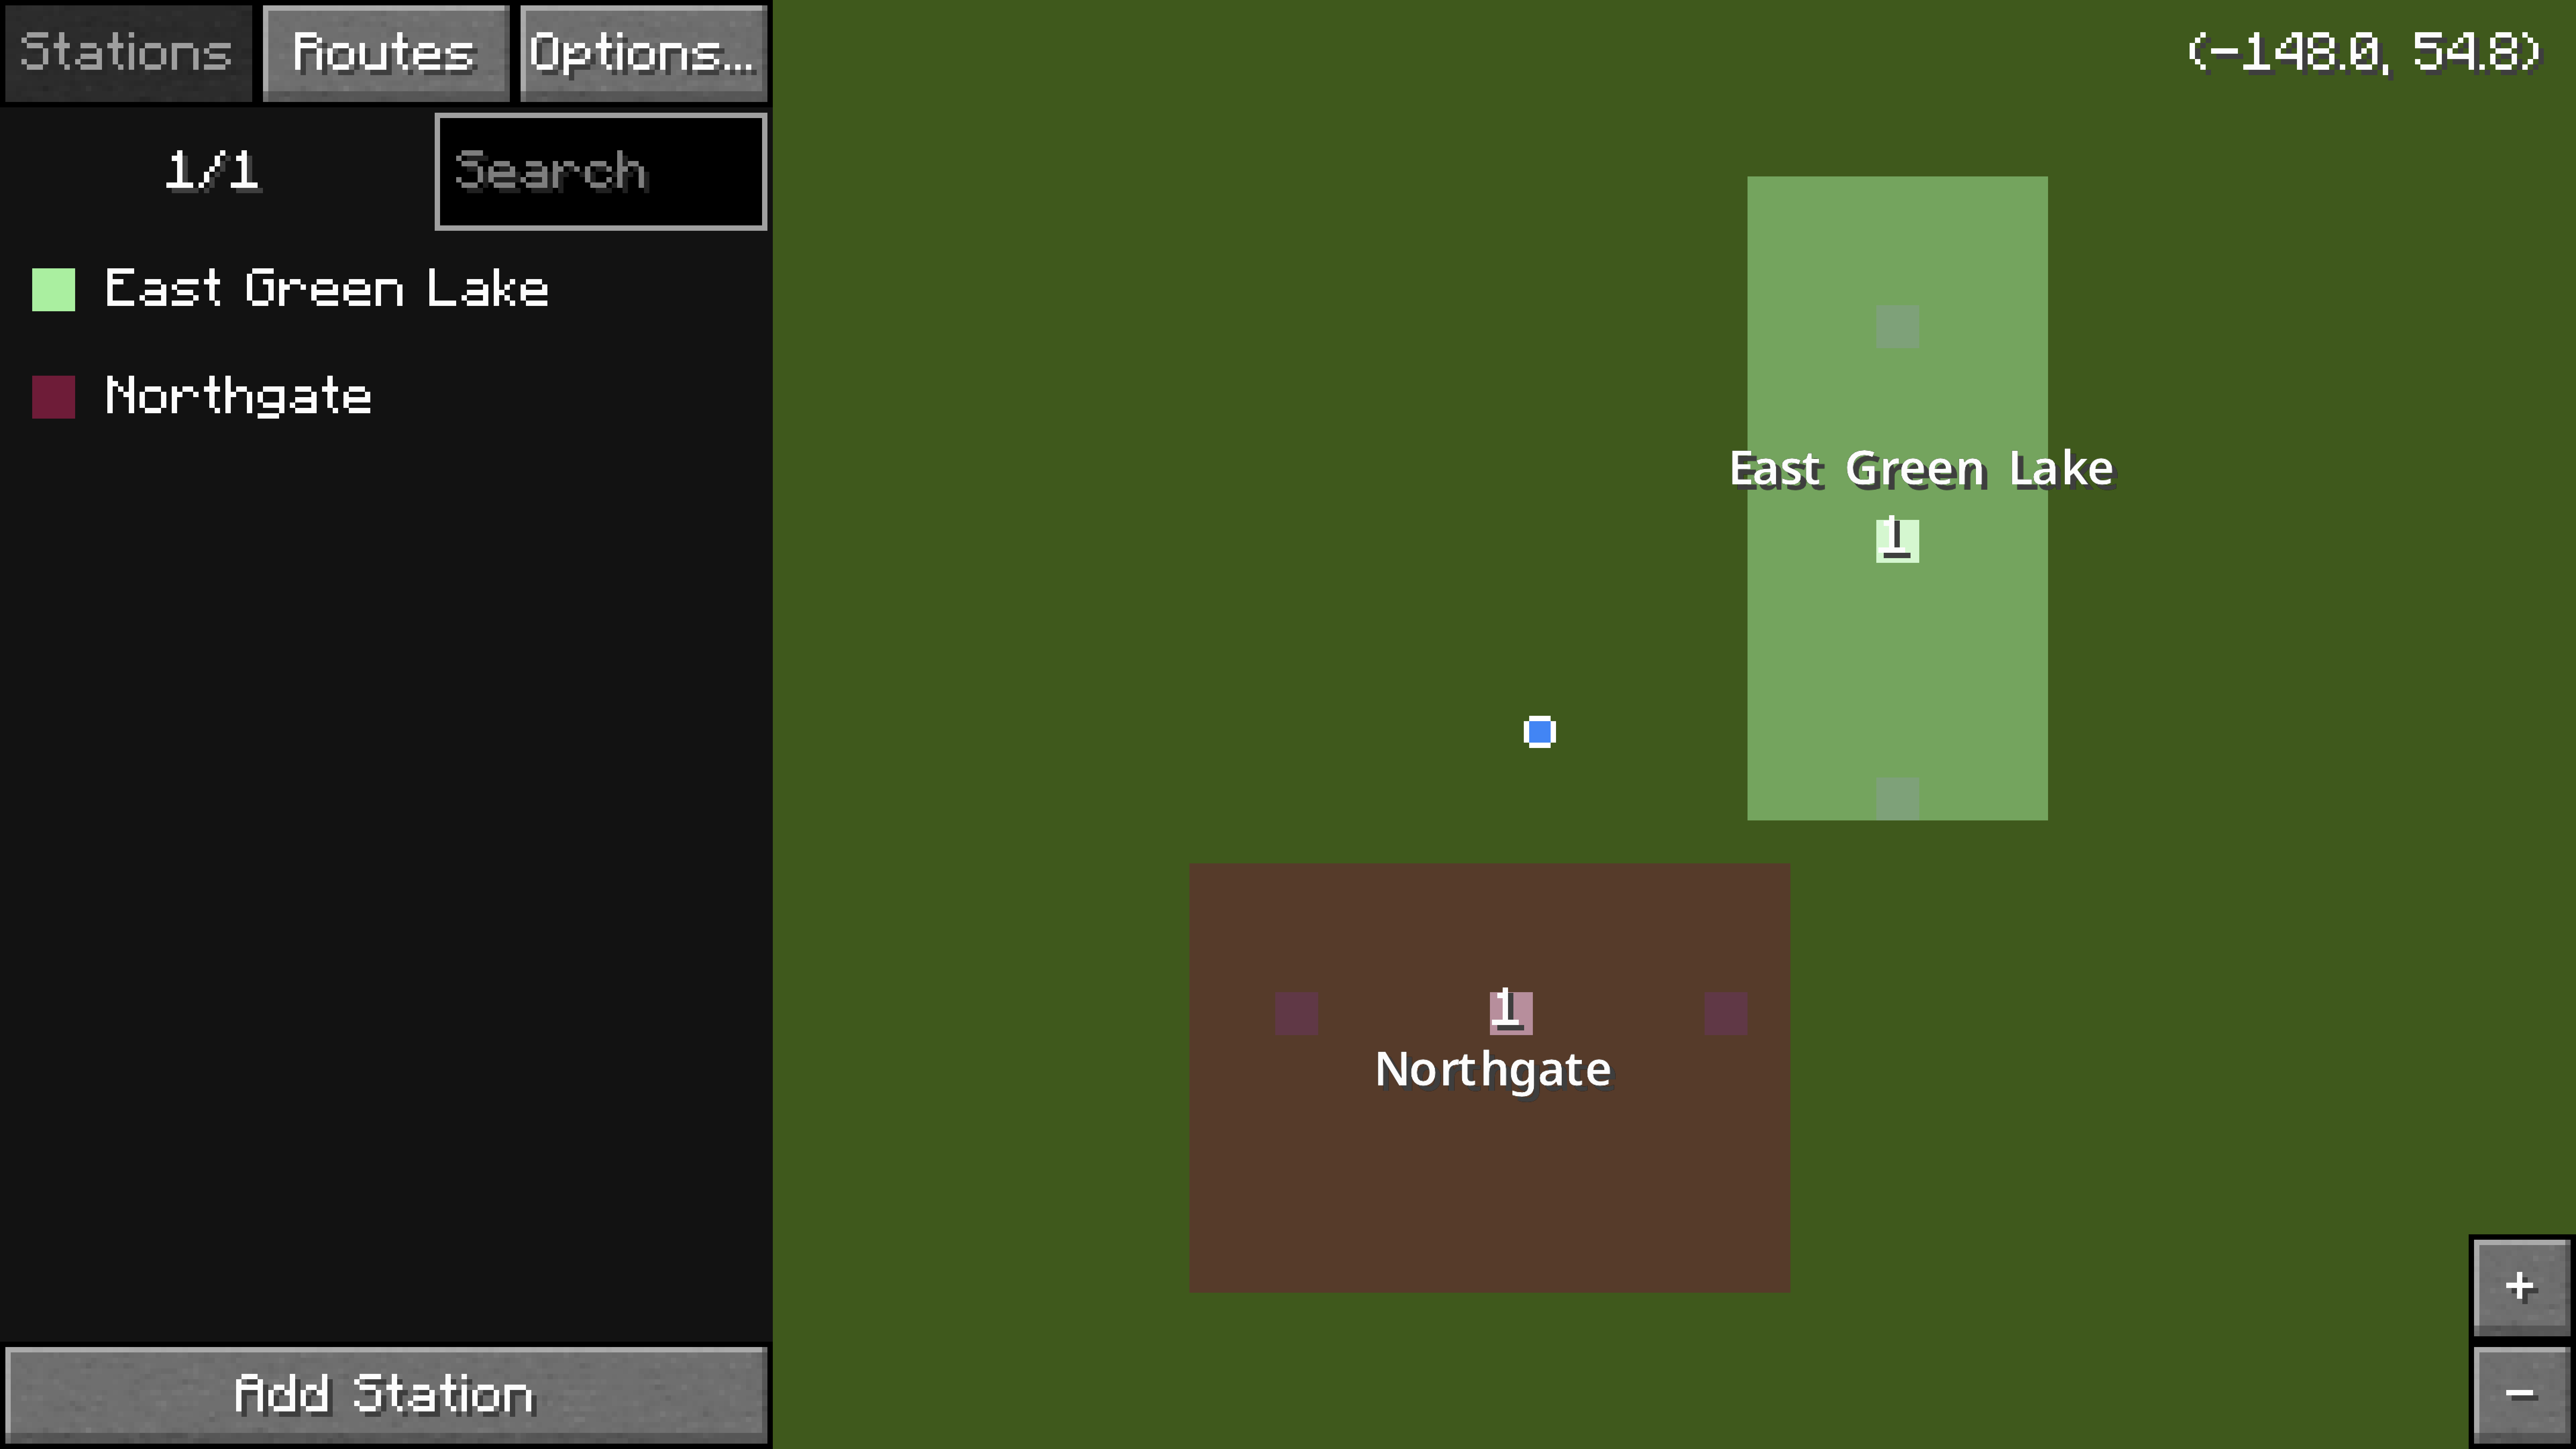
The two stations should now be visible on the map.
Routes
A route is simply a list of platforms (not stations). Trains assigned to a route will attempt to find a path to visit all the platforms. At the end of the route, the trains will be removed.
- Inside the railway dashboard, click on the
Routestab. - Click on the button at the bottom called
Add Route. - The map is now in edit mode. Click on the first platform (in white) on the map. It should show up under the
Routestab on the left. - Click on the second platform on the map. There should now be two entries under the
Routestab on the left. - Type in a name for the new route. Use the
|character to separate different languages, for example馬鞍山綫|Ma On Shan Line. - Click
Donewhen finished.
A route serving the two platforms has been created.
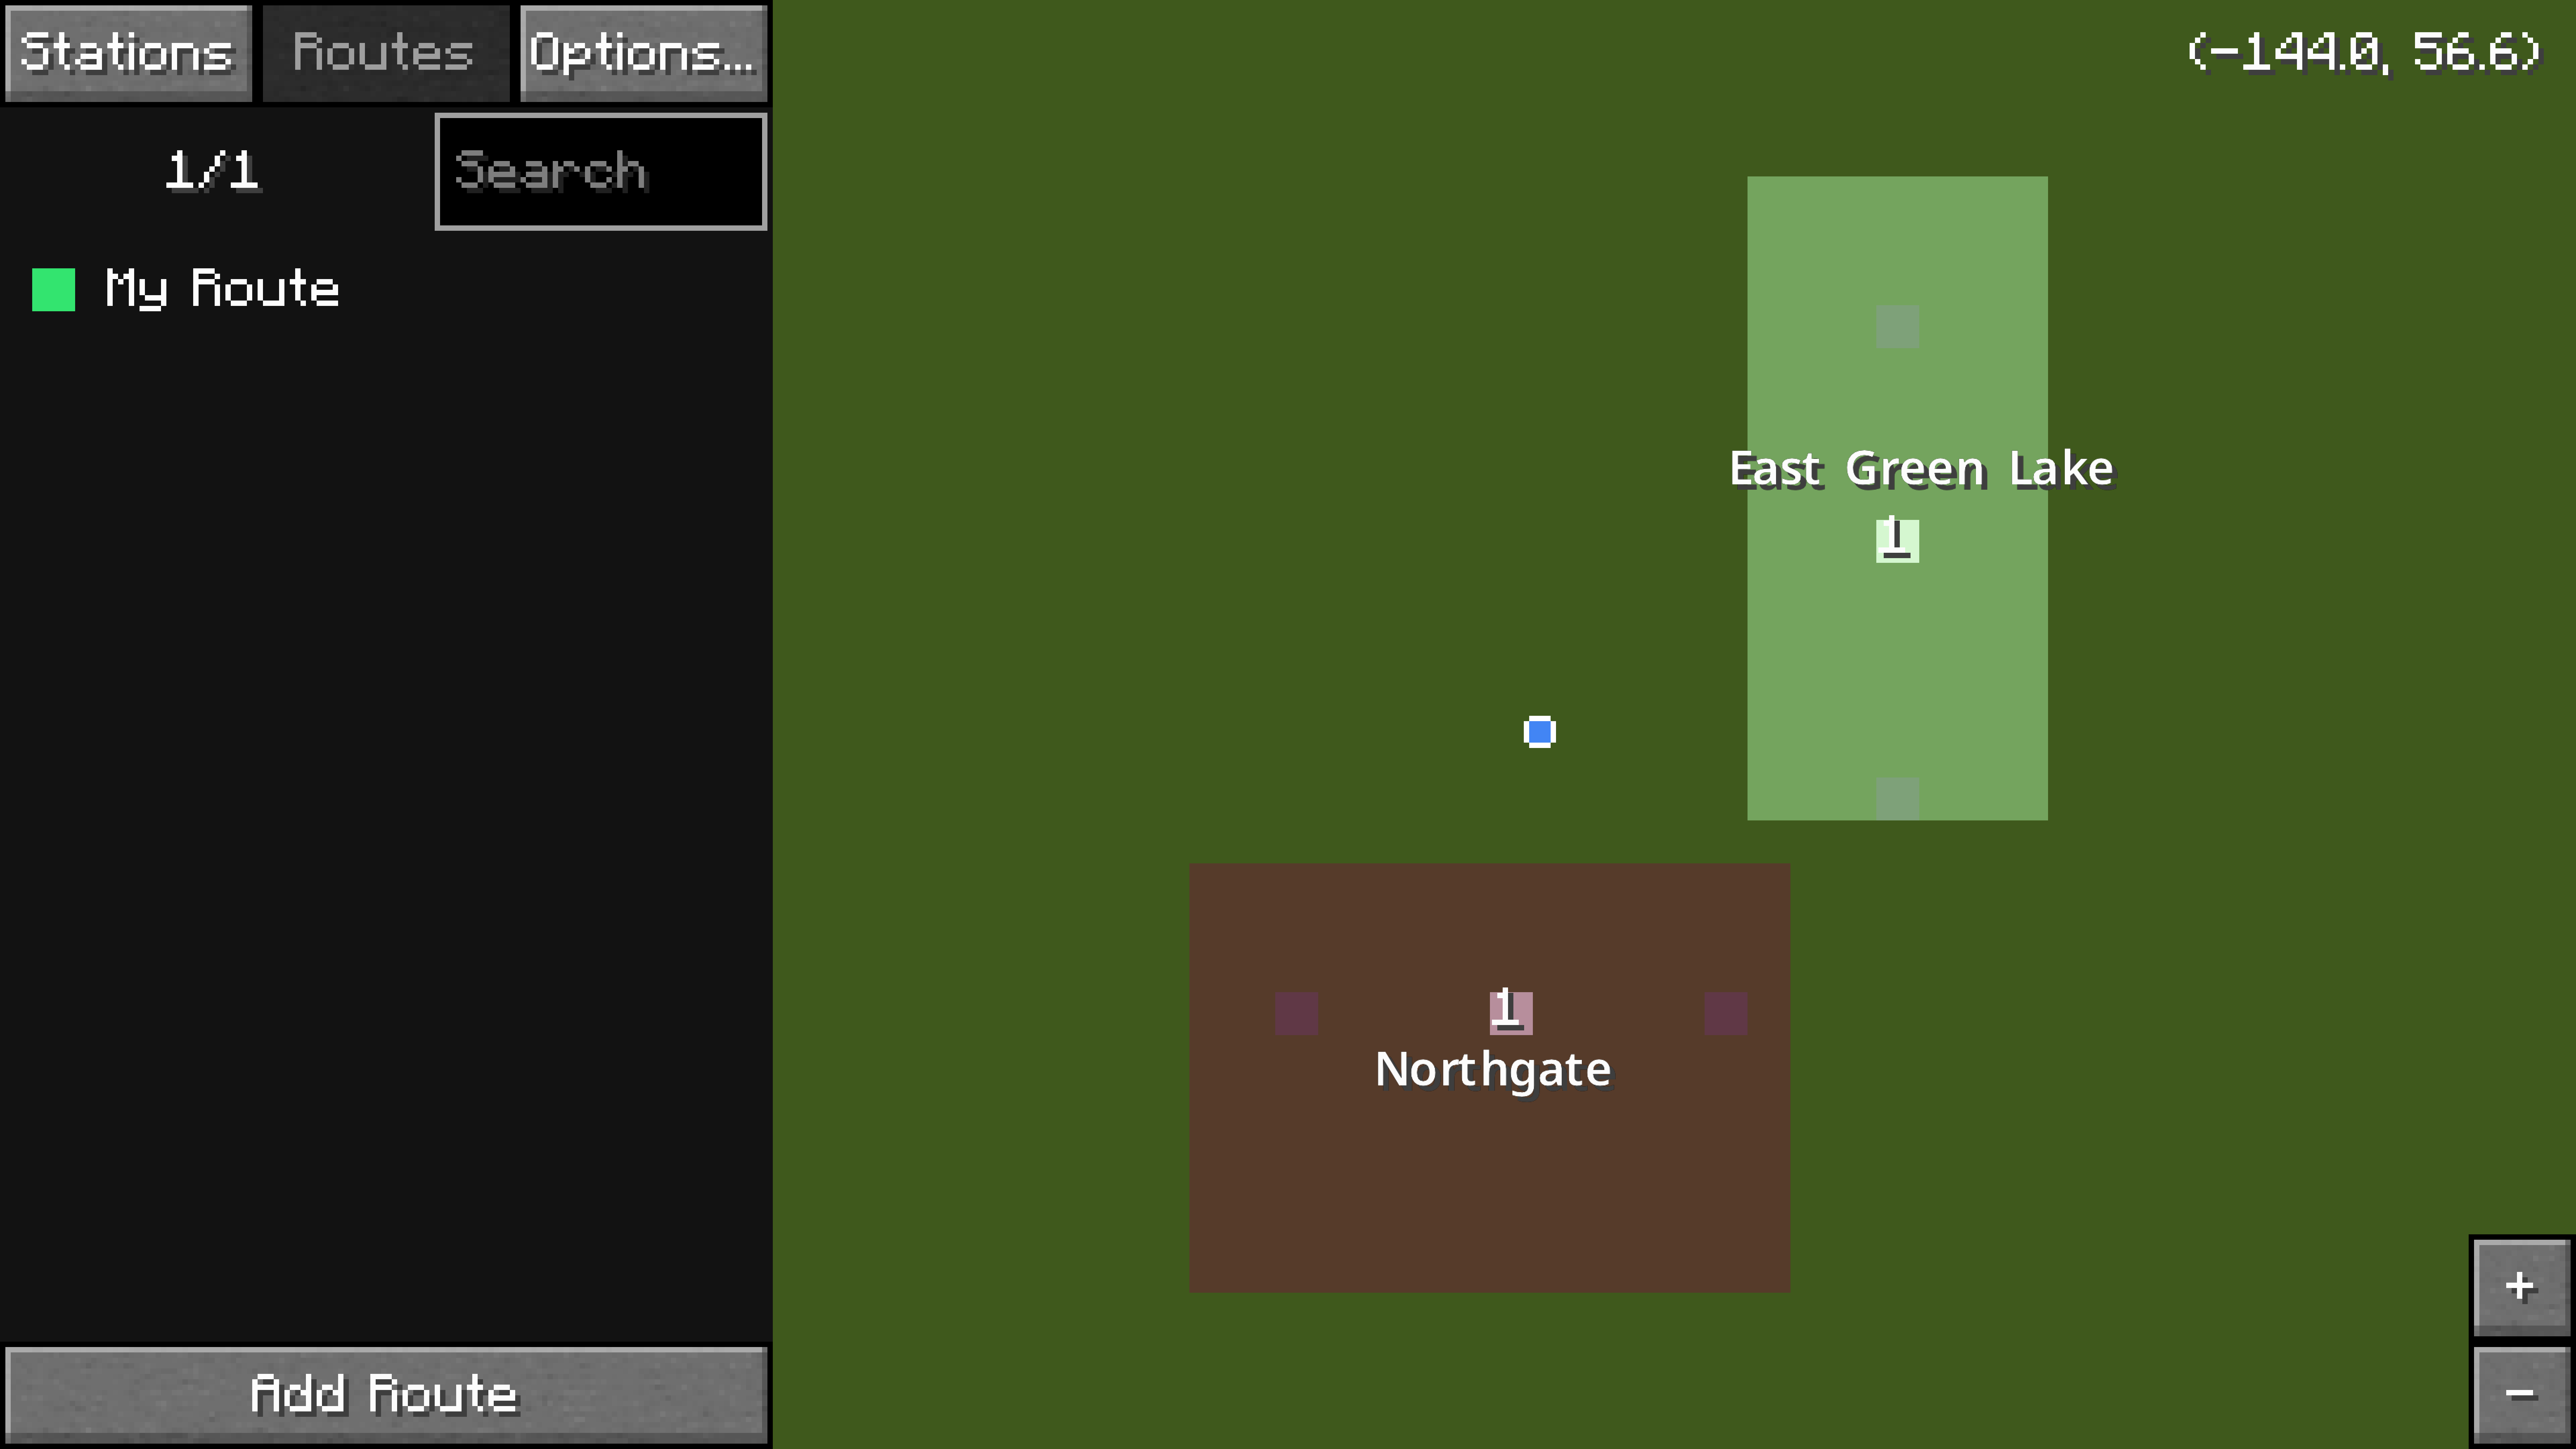
The route is now complete! Hit Esc on the keyboard to exit out of the railway dashboard.
Depots and Sidings
A siding is a section of track where trains can spawn from, and a depot provides instructions for where trains should go.
- Create a siding rail by following the steps above (outlined in the Creating a Rail section) while using the siding rail connector item.
- Using any of the other rail connector items (not the platform or siding rail connector items), connect the siding to the first platform of the route.
- Connect the siding again to the last platform of the route.
- Obtain the railway dashboard item and right click to open it.
- On the
Depotstab, click on the button at the bottom calledAdd Depot. - Draw a depot area over the siding and type a name into the text box. This process will be very similar to how the stations were created.
Schedules
The depot must be given a schedule and instructions in order for trains to move along the predefined route. Hours listed on the schedule are based on the game time, not real life time.
- Inside the railway dashboard, make sure the
Depotstab is selected. - Click on the siding (in white) on the map.
- Click on the
SP 1900button. This will change the train type that will spawn. - Select
Minecartand click on the+button. - Hit
Escon the keyboard to return to the main dashboard screen. - Hover over the newly created depot and click on the pencil icon. The schedule configuration screen should appear.
- Drag all the sliders to the very right. This means that trains will spawn every twenty seconds in real life.
- Click on
Edit Train Instructionsand hover over the route that was just created. Click on the+button to add it to the train instructions. - Click on
Refresh Path. This button must be clicked every time the train instructions or rails have been modified. - Hit
Escon the keyboard to exit out of the menu, and again to exit out of the dashboard.
A train made up of minecarts should start spawning every twenty (real life) seconds.
Platform Blocks
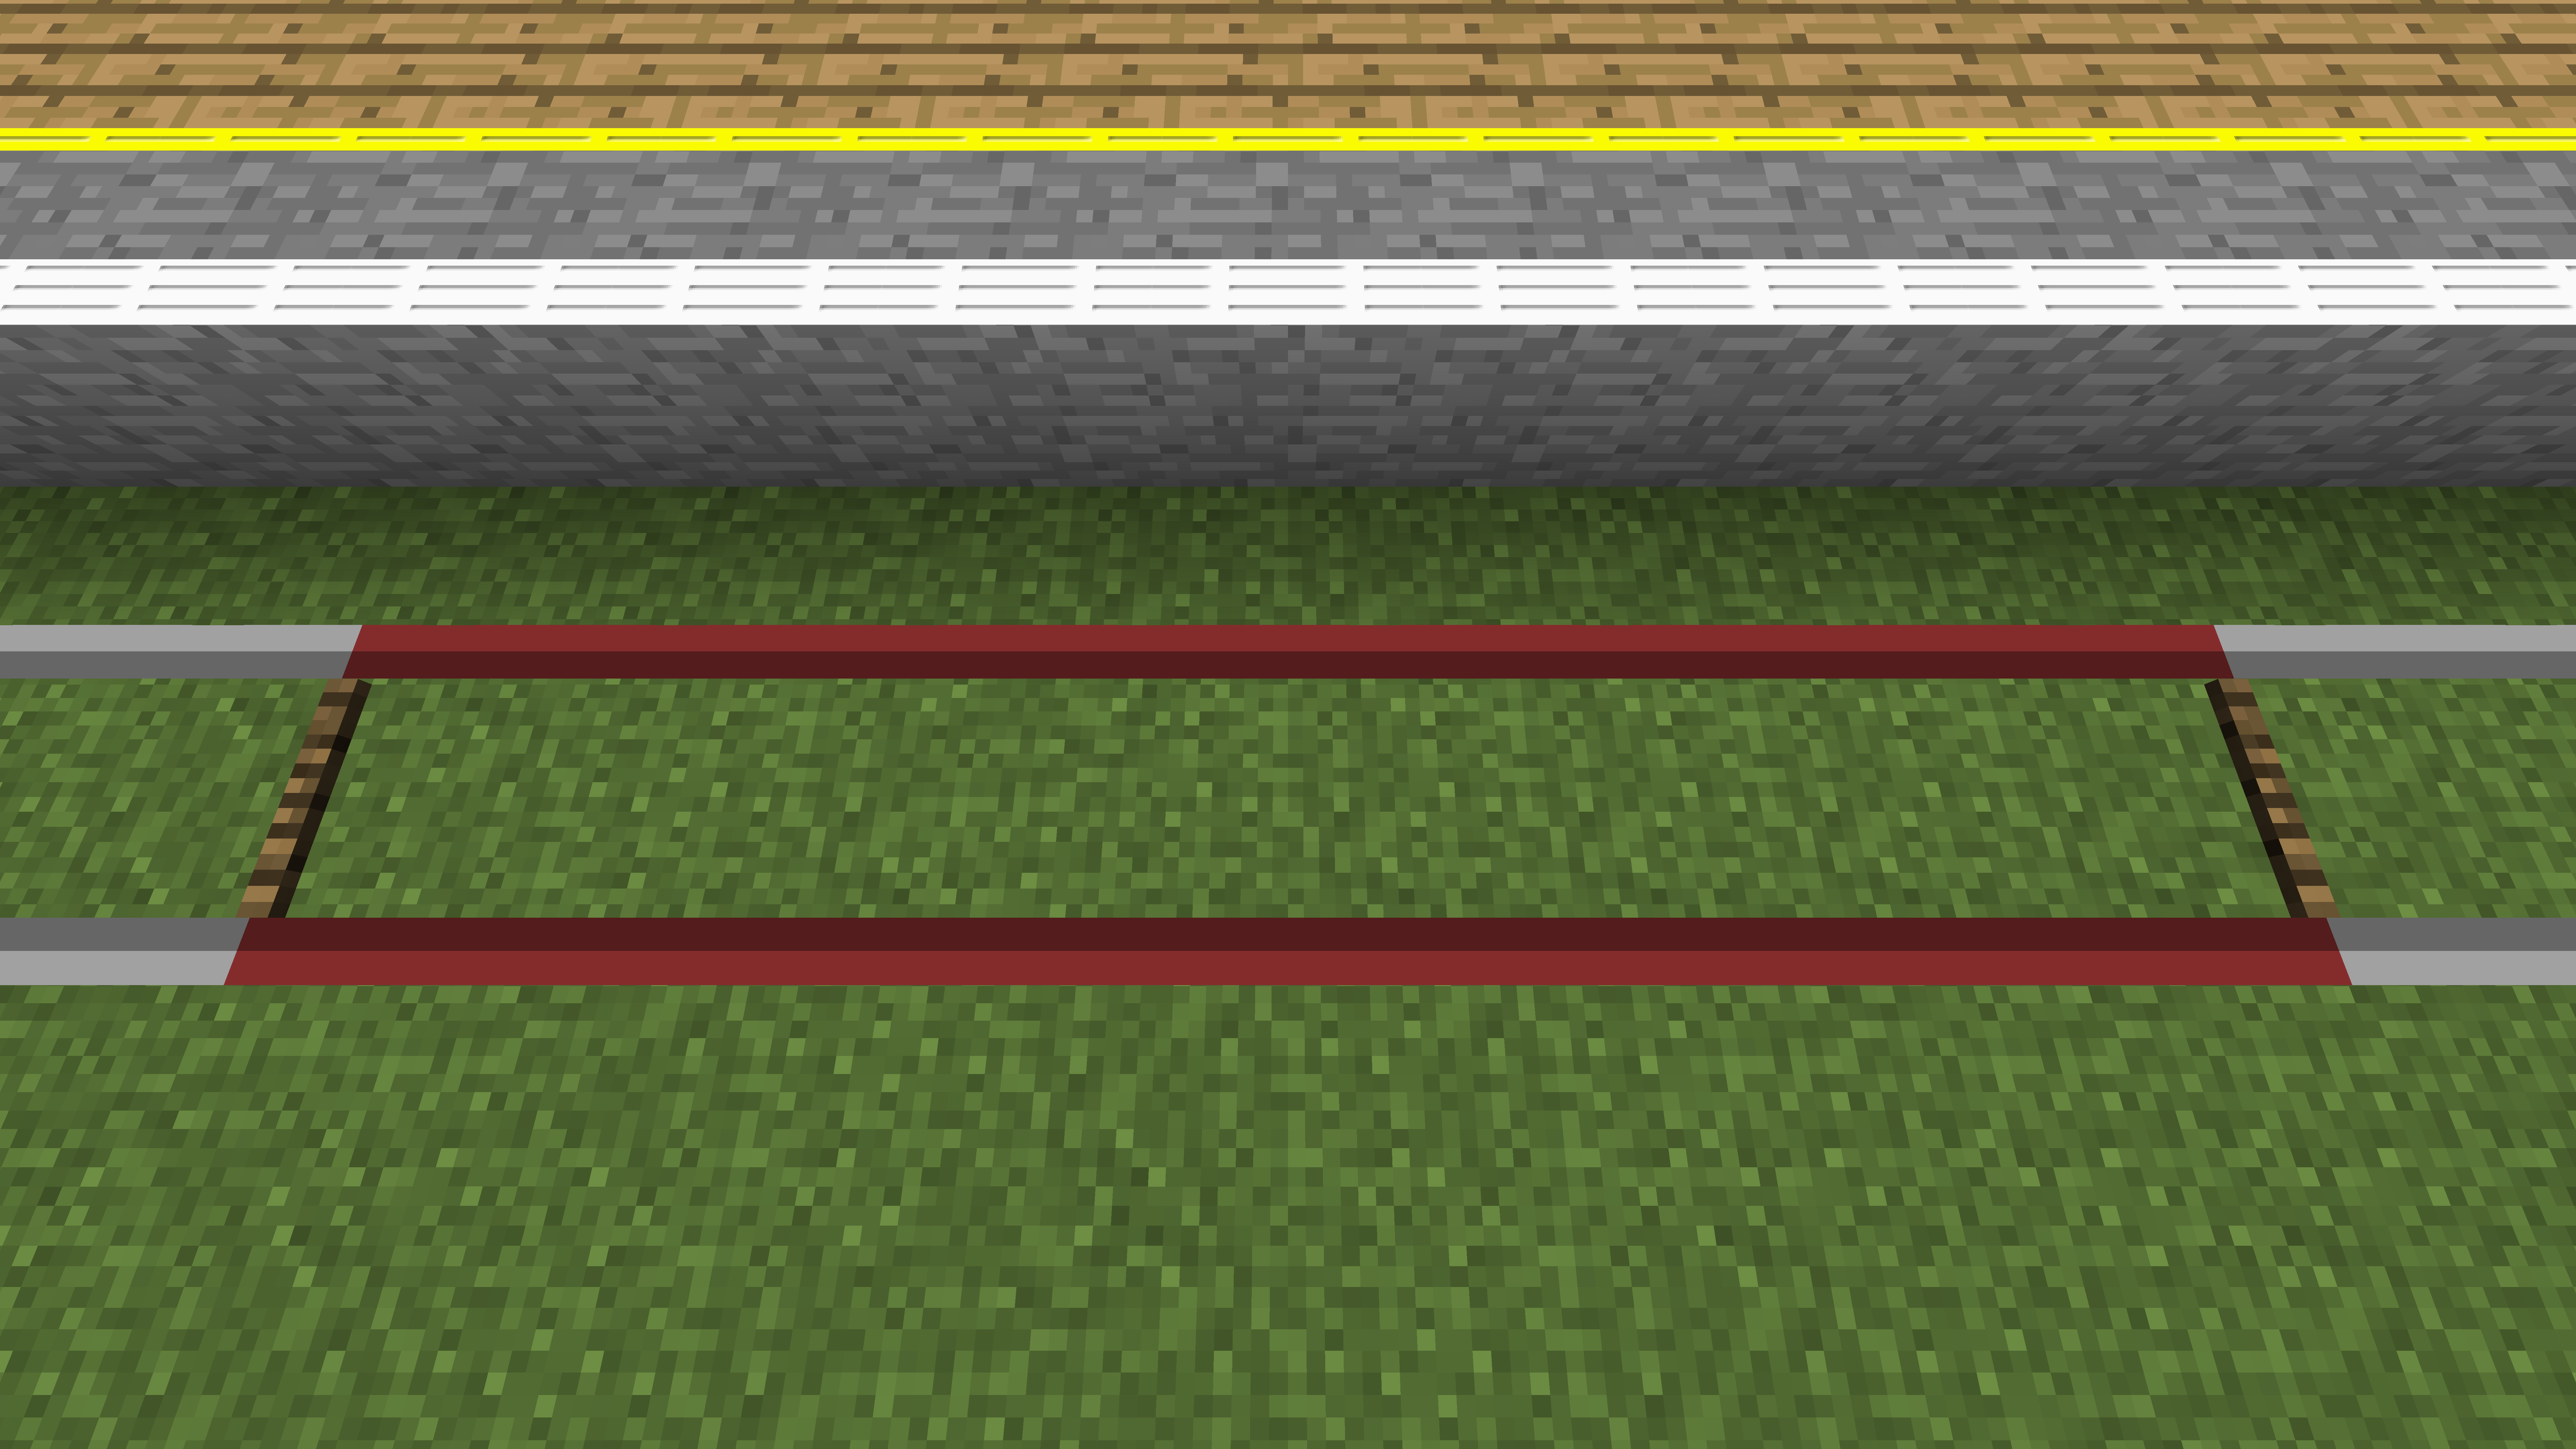
Platform blocks are required to pick up passengers. Place down a row of platform blocks by each platform rail.
Platform blocks should be placed by the platform rail.
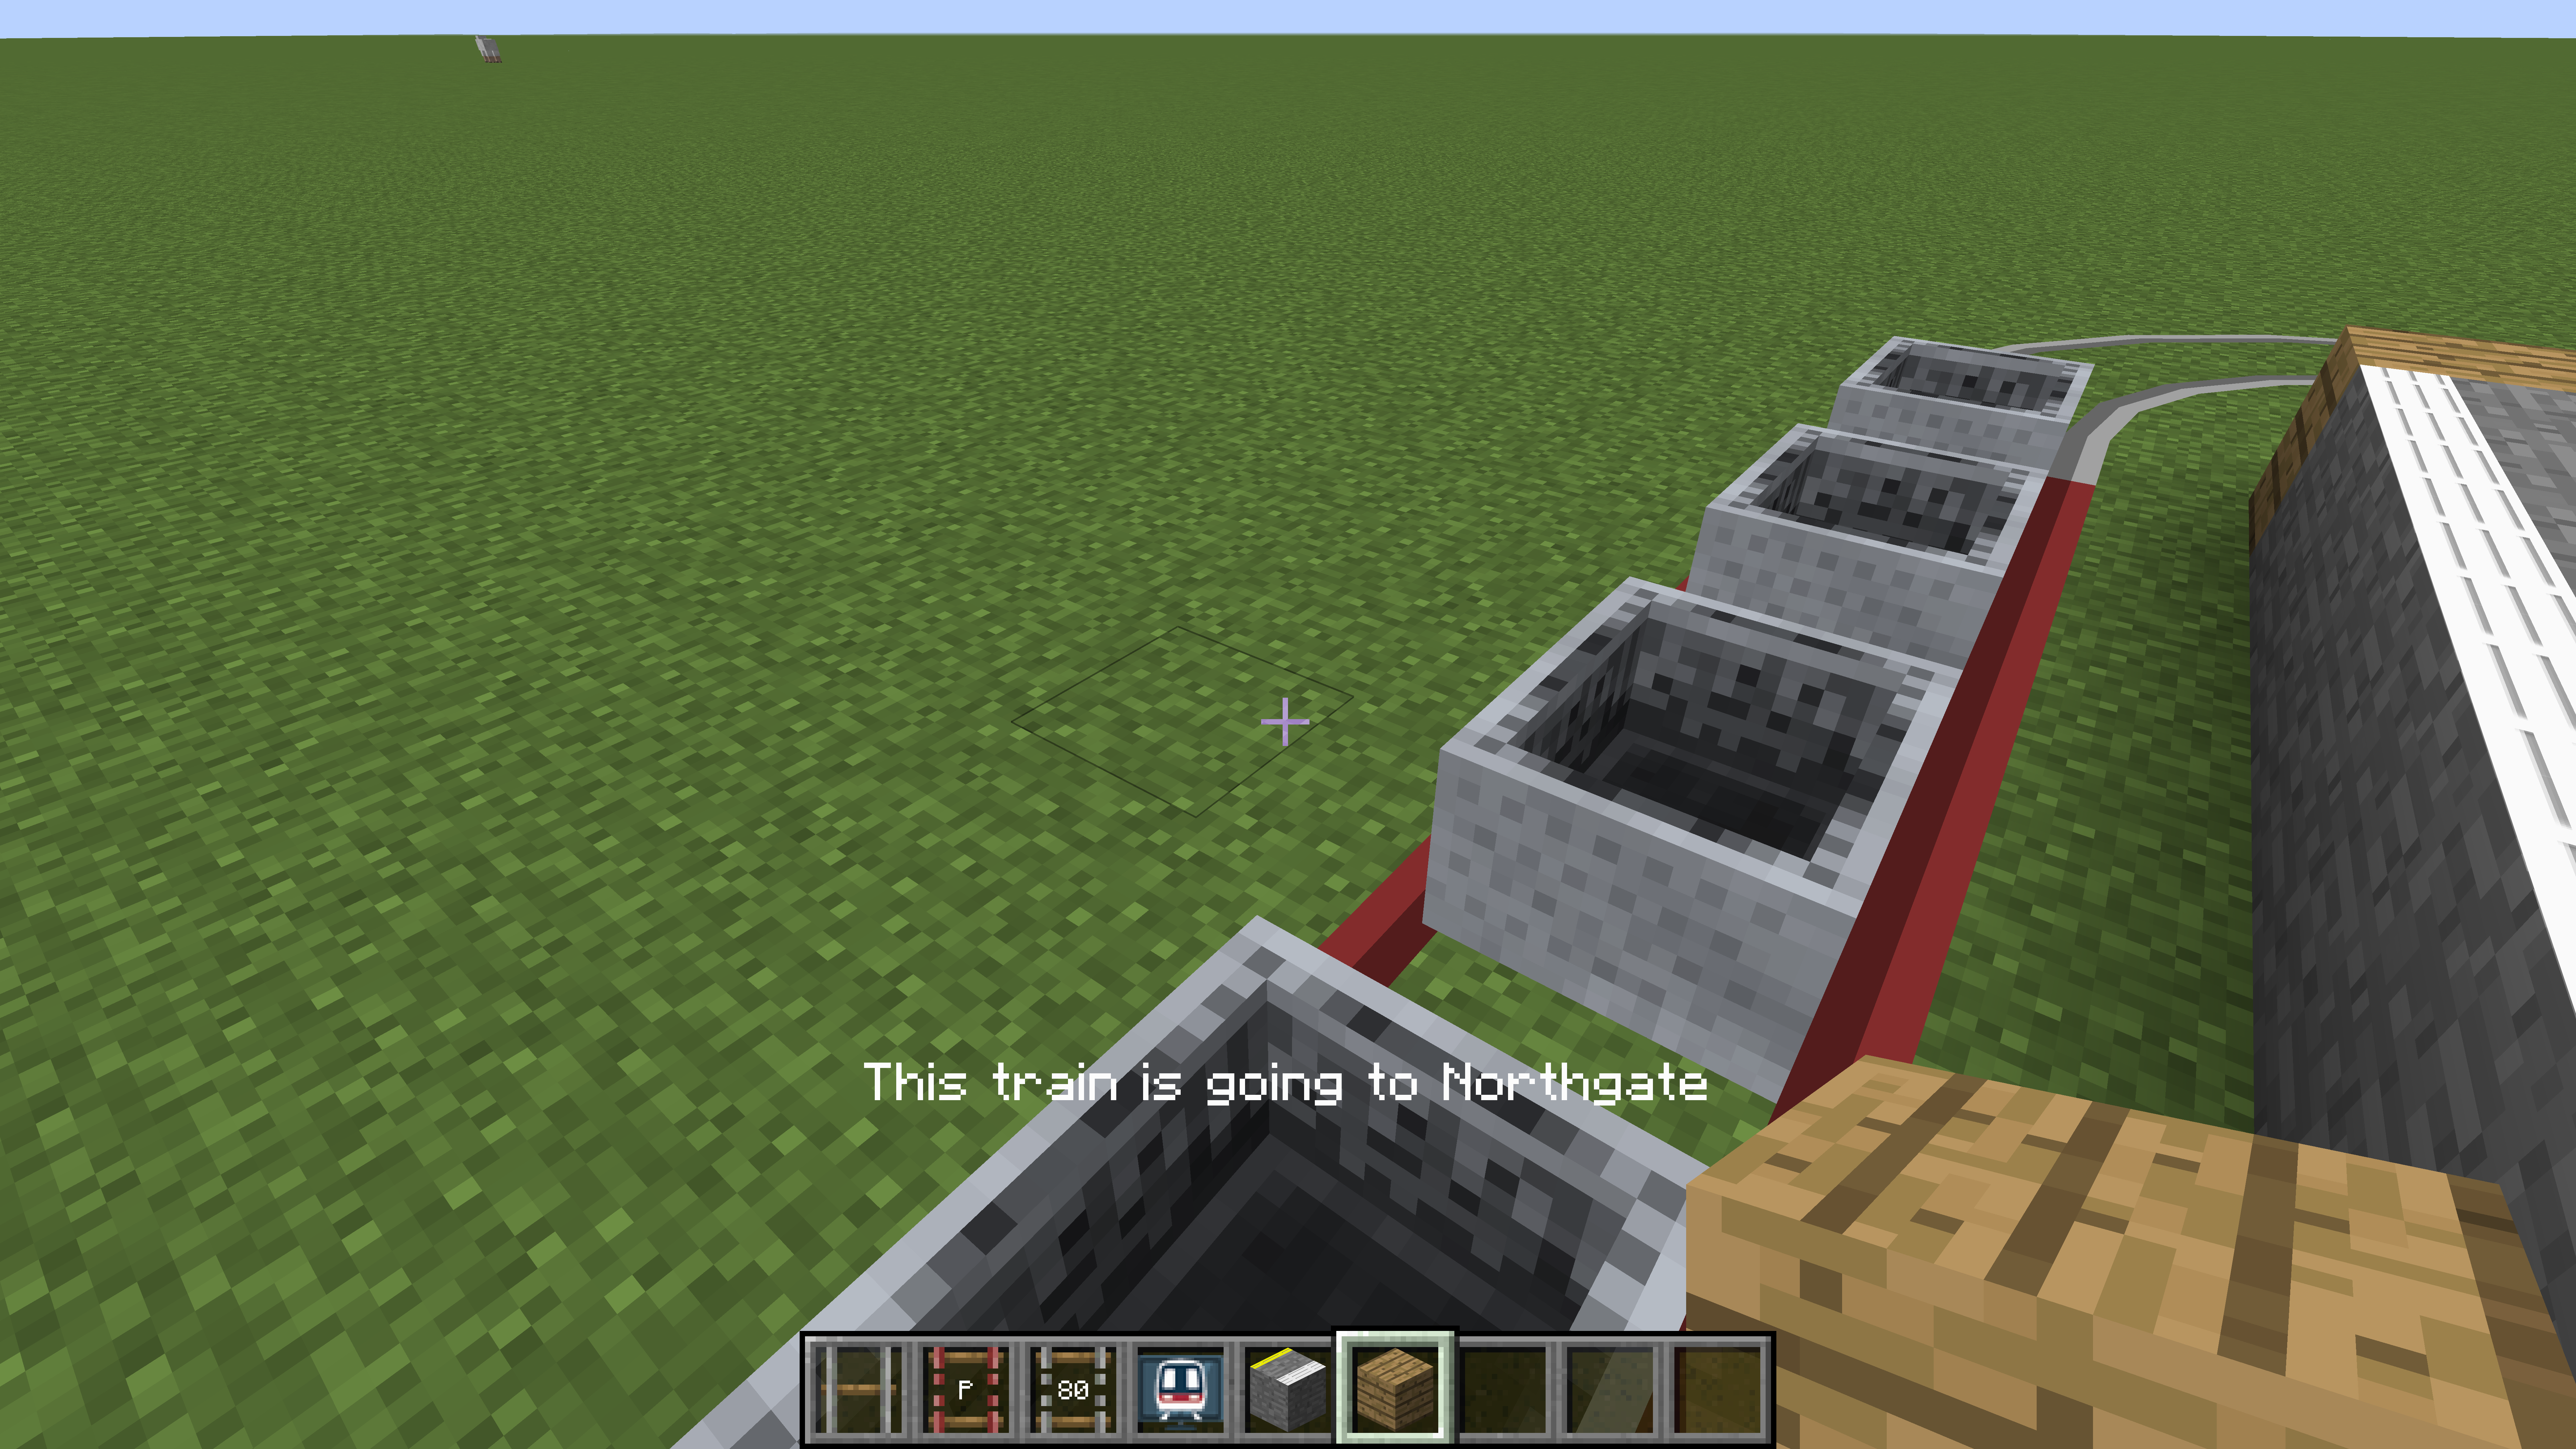
Walk onto any of the minecarts to hop in. Enjoy the ride; your first railway is complete!
A player is enjoying the train ride.
Notes
- Each route must have at least two platforms, or else no trains will spawn.
- More than one route may be added to the train instructions.
- The siding must be connected (with rails) to the first platform of the first route and the last platform of the last route.
- The
Refresh Pathbutton must be clicked every time the train instructions or rails have been modified.
- Trains will momentarily stop at each platform. This is normal.
- The train with minecarts is not actually made up of real minecarts from the vanilla Minecraft game. In fact, placing in a vanilla minecart manually on the rails won't interact with the routes or schedules at all.
- The length of the train that will spawn is limited by the length of the siding.
- If the platform is too short to spawn even one carriage, no trains will appear!
- See the Trains page for the length of each train.