This is an old revision of the document!
Table of Contents
Getting Started
This tutorial will guide you through the basics of the Minecraft Transit Railway mod. This tutorial is for MTR version 4.0.x. Any step of the tutorial may change when using an older or a newer version. This mod is recommended to be used in creative mode, but survival mode is also supported with crafting recipes. We recommend a mod such as Just Enough Items for a list of crafting recipes.
Video Tutorials
Please see this playlist for video tutorials.
Transport Modes
MTR has 4 modes of transport:
- Trains
- Boats
- Cable Cars
- Airplanes
Each mode of transport works independently of each other and has its own dashboard and node system. Making buses is possible using hidden rails. The tutorial on this page will only be covering trains.

The four dashboards of Minecraft Transit Railway
Building Your First Railway
First steps
The four main components of the railway are the following:
- Rails
- Stations
- Routes
- Depots
The most important items are the railway dashboard, the rail node, the rail connectors and the brush.
Rails
Rails specify the path your vehicles will take.
To make a new rail, place two rail nodes and connect them using rail connectors. Rail nodes can also be rotated 90 degrees, 45 degrees or 22.5 degrees. While connecting the rails, you may see information about your rail, such as the XYZ offset, the horizontal radius and the total lenght. If you'd like to see this information after you connected your rails, point your crosshair to one of its rail nodes and look in the direction of the desired connection. Holding a rail related item, such as a brush, connector or node will show the type and arrows (if one-way) of every rail. To remove a rail connection, break one of the nodes or use the rail remover item. There are five types of rail connectors for trains, which are:
- Speed limit
- Speed limit (one-way)
- Platforms
- Sidings
- Turnbacks
- Rail Remover
If you get an error such as “Could not connect rail; invalid orientation”, check the rotation of your rails. There are other special types of rails that do not work with trains, and for that reason they will not be explained in detail in this tutorial.

All rail connectors of the mod and the rail remover

Several rail connections with different rotations

The same rails as above but with the image taken with a rail related item in hand

Viewing the properties of a rail with a brush
Platforms
A platform is a section of track where trains can stop to pick up passengers.
- Create a platform rail by following the steps above while using the platform rail connector item.
- Go to your next station and place another platform rail, not connected to the first one. It is recommended to keep it about the same length as before. This will be the second train platform.
- Connect the two train platforms together using any of the other speed rail connector items. Use more rail nodes if necessary.
Stations
A station is a rectangular area marked in the world. Each station should completely cover one or more platforms and each platform should be covered by a station.
- Open the railway dashboard item
- The menu on the left has three tabs:
Stations,Routes, andDepots.- The
Stationstab is selected by default. - The map on the right shows the current world.
- The blue dot with a white outline marks the current player location.
- Platforms are bright white on the map. If you zoom in, you may see the number.
- Click and drag on the map to move it.
- Use the mouse scroll wheel or the
+or-buttons on the bottom right to zoom.
- Zoom and move around the map to find the first platform that was built.
- On the
Stationstab, click on the button at the bottom calledAdd Station. - The map is now in edit mode. Left click and drag to draw a rectangular station area over the first platform.
- If a mistake was made, just click and drag again. The previously defined station area will disappear.
- At the text box on the bottom left, type in a name for the new station. Use the
|character to separate different languages, for example第一城|City One. - Click
Donewhen finished. - Move around the map to find the second platform that was built.
- Click on the
Add Stationbutton again. Draw another rectangular station area, covering the second platform. Type in a name for the second station. - Click
Donewhen finished.
Two example stations, Northgate and East Green Lake, have been created in the railway dashboard.
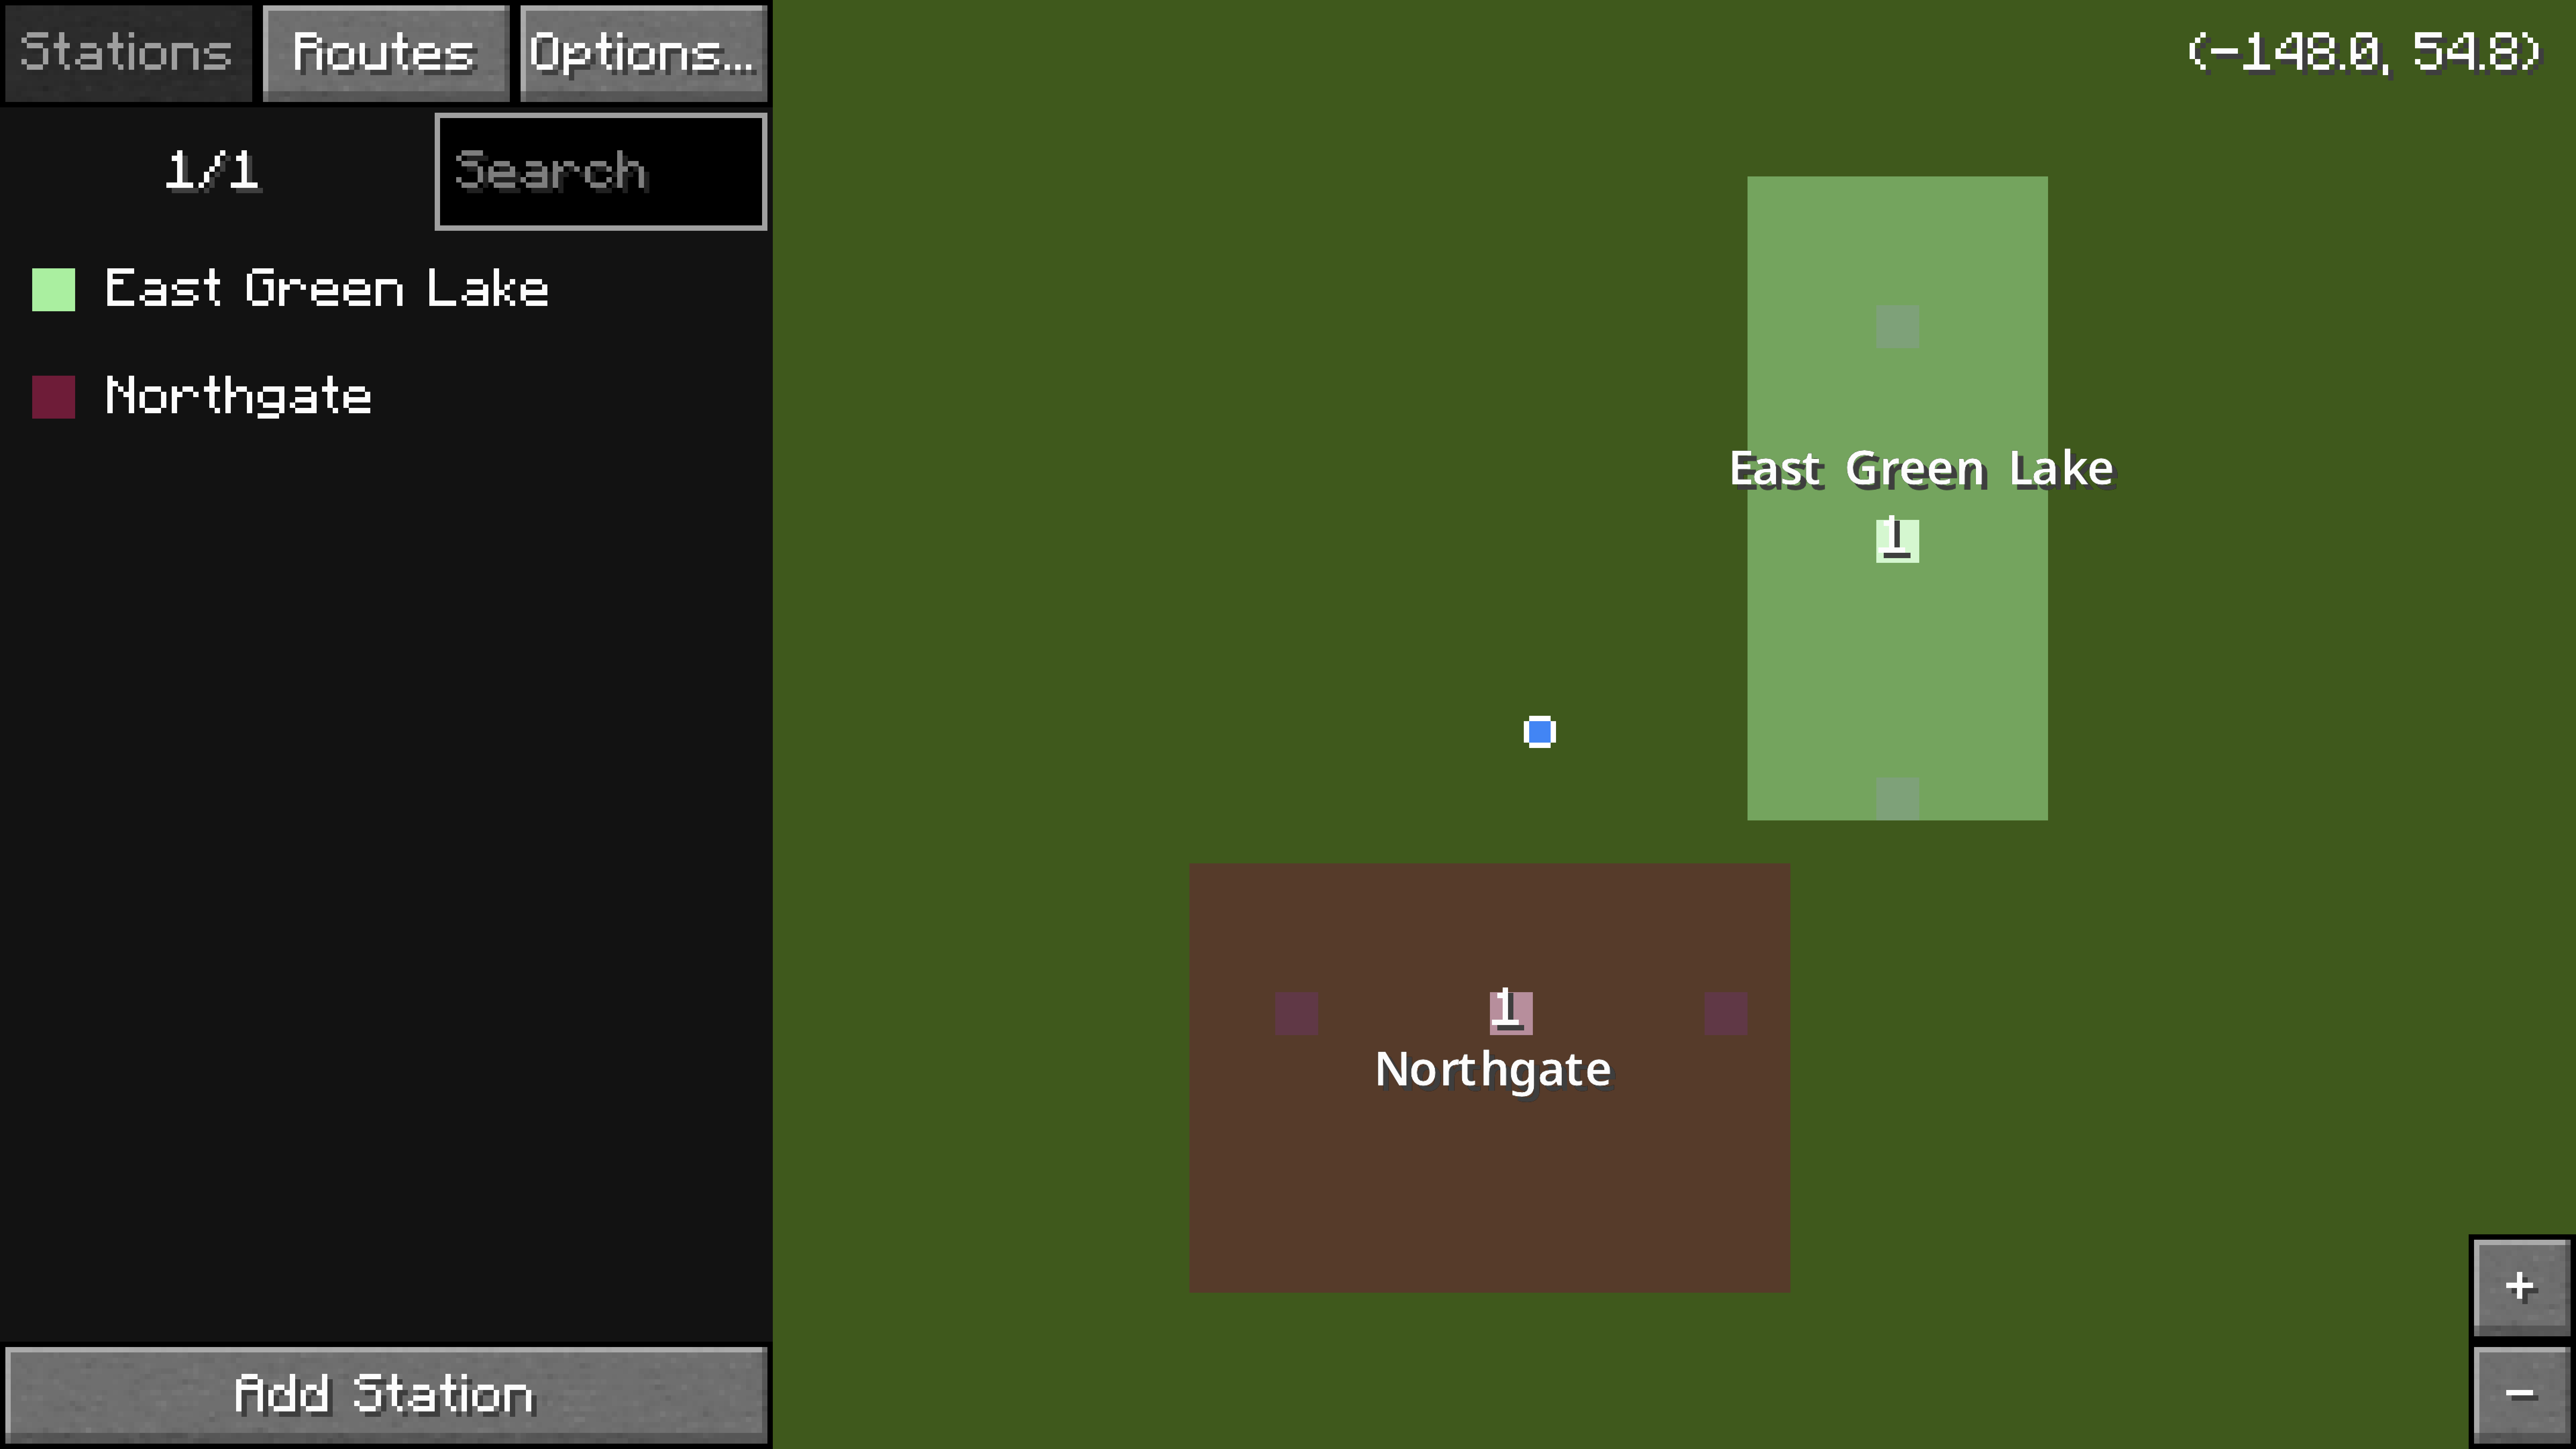
The two stations should now be visible on the map.
Routes
A route is simply a list of platforms (it will display the stations the platforms are at, if the platform is not inside a station area then it will appear blank). Depots assigned to a route will first attempt to find a path between each siding and the first platform selected and then to all the platforms. At the end of the route, the trains must find their way back to the depot.
- Inside the railway dashboard, click on the
Routestab. - Click on the button at the bottom called
Add Route. - The map is now in edit mode. Click on the first platform (in white) on the map. It should show up under the
Routestab on the left. - Click on the second platform on the map. There should now be two entries under the
Routestab on the left. - Type in a name for the new route. Use the
|character to separate different languages, for example馬鞍山綫|Ma On Shan Line. - Click
Donewhen finished.
A route serving the two platforms has been created.
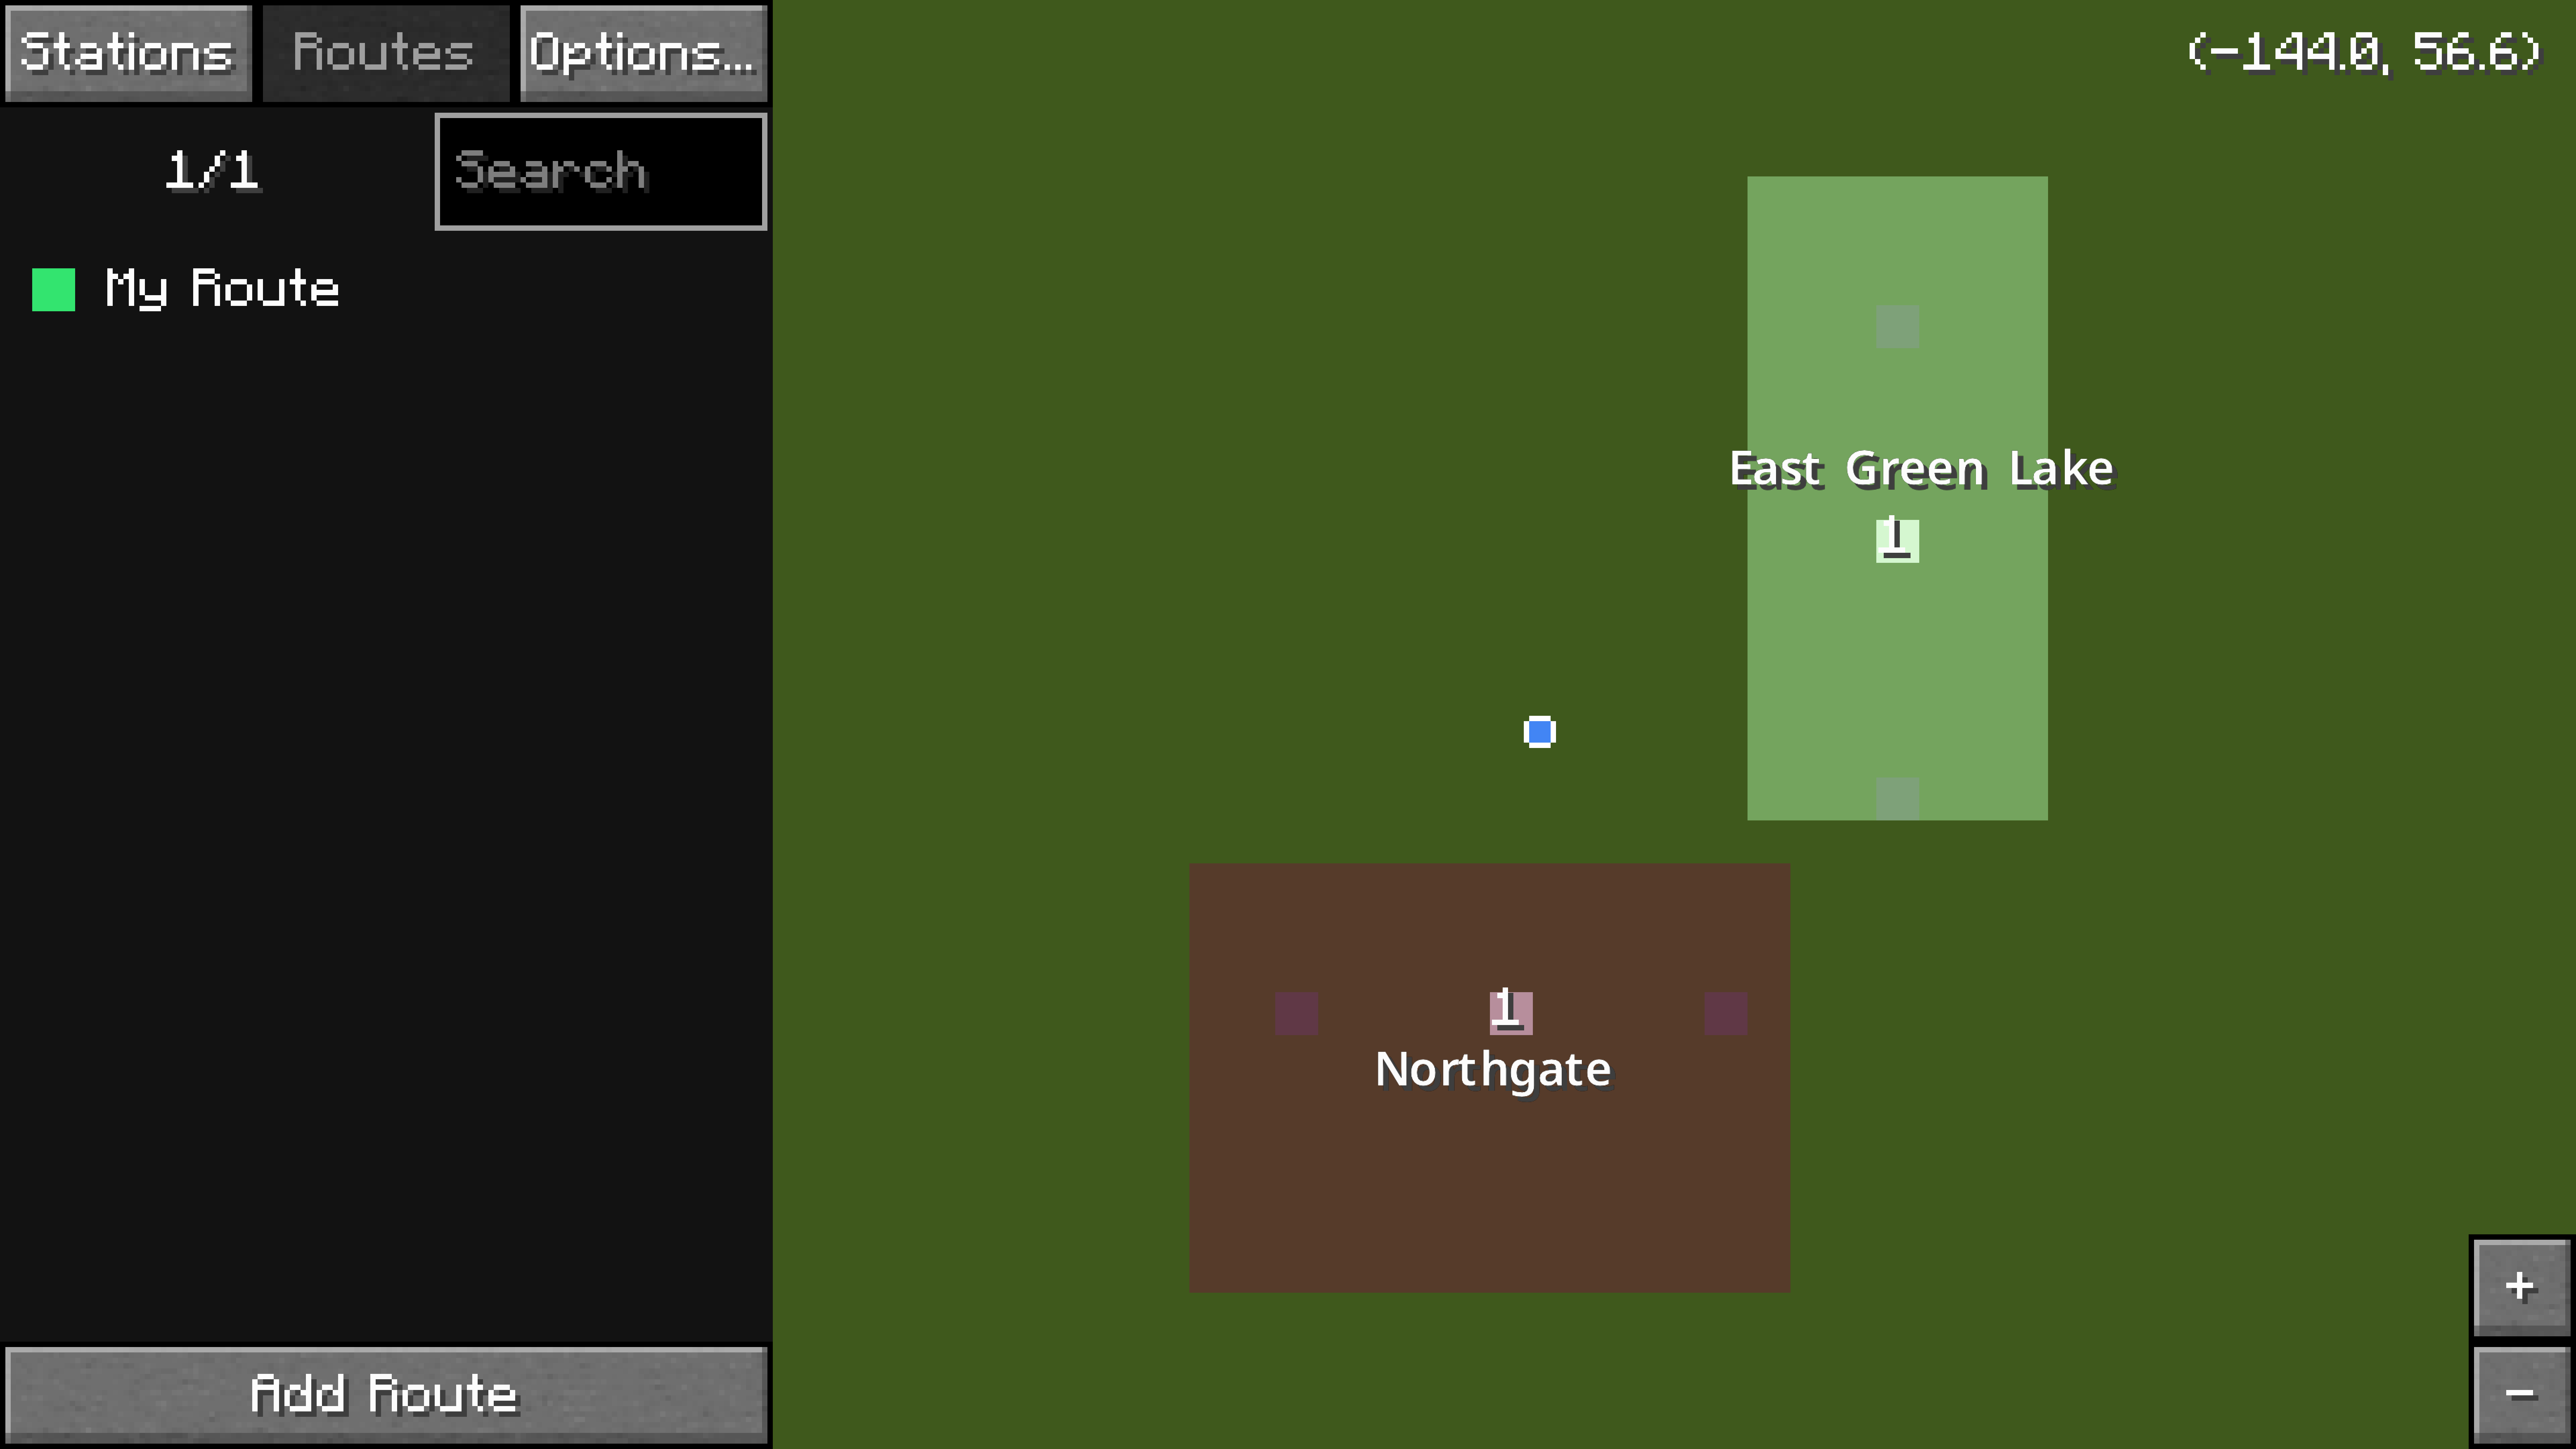
The route is now complete! Hit `Esc` on the keyboard to exit out of the railway dashboard.
Depots and Sidings
A siding is a section of track where trains can spawn from, and a depot provides instructions for where trains should go.
- Create a siding rail by following the steps above (outlined in the Creating a Rail section) while using the siding rail connector item.
- Using any of the other rail connector items (not the platform or siding rail connector items), connect the siding to the first platform of the route.
- Connect the siding again to the last platform of the route.
- Obtain the railway dashboard item and right click to open it.
- On the
Depotstab, click on the button at the bottom calledAdd Depot. - Draw a depot area over the siding and type a name into the text box. This process will be very similar to how the stations were created.
- Click the pencil icon and select your routes in the desired order.
Selecting a train
- Inside the railway dashboard, make sure the
Depotstab is selected. - Click on the siding (in white) on the map.
- Click on the
Editbutton. This will change the train type that will spawn. - Select the desired train:
- Choose the type of train you'd like to use
- First, add the
Cab˙car type, specifically theForwardsone. - Add the desired amount of trailers, the
Duplicate Carsbutton may help. - The last car should be the
Backwardscab type. - If you see a
⚠icon, then your siding isn't long enough to fit that specific type of car. To fix that, simply make your siding longer. Resize your depot if necessary
- Press the
Donebutton and configure the number of trains, acceleration, deceleration, speed increases when delayed and if the train on the siding should be drivable. - Press the
Escbutton on the keyboard to return to the main dashboard screen.
 Selecting a train for a siding
Schedules
The depot must be given a schedule and instructions in order for trains to move along the predefined route. There are two types of schedules: Minecraft Time and Real Time.
Minecraft Time
Hours listed on this type of schedule are based on the game time, not real life time.
- Hover over the desired depot and click on the pencil icon. The schedule configuration screen should appear.
- Drag all the sliders to the desired position. For example, if you drag all sliders to the very right, that will mean that trains will spawn every twenty seconds in real life.
- Hit
Escon the keyboard to exit out of the menu, and again to exit out of the dashboard.
Your train should start spawning every twenty (real life) seconds.
 Example of a depot with Minecraft time schedules
Real Time
- To get started with real time scheduling, click the "Minecraft Time" button on the top left to turn your depot into real time mode.
- There is a text input at the bottom. Enter a time, such as
17:00:00. Now your train will spawn every day at 5 pm in your time zone. - If you'd like more trains, enter more times.
- You can automate this process by multiplying the times. If you'd like your trains to run at a specific frequency all day, enter
00:00:00+[desired time in minutes divided by 1440]*[desired time in hh:mm:ss format] For example, if you enter00:00:00+1440*00:01:00`, your trains will spawn every minute. Here are more examples:- If you enter
00:00:00+720*00:02:00, your trains will spawn every 2 minutes - If you enter
00:00:00+480*00:03:00, your trains will spawn every 3 minutes - If you enter
00:00:00+288*00:02:00, your trains will spawn every 5 minutes - If you enter
00:00:00+144*00:02:00, your trains will spawn every 10 minutes
- If you'd like to search for a specific time, use the search bar on the top right.
- If you'd like to delete all departures, click the reset button above the search bar
 Example of a depot with real time schedules
Platform Blocks
Not to be confused with platform rails
Platform blocks are required for trains to open their doors and pick up passengers. Place down a row of platform blocks by each platform rail. Each door needs a platform block in front or else it will not open.
 Platform blocks next to a platform rail
Refreshing the path
- After you set up everything for your line, go back to your depot menu and click
Refresh Path - If you encounter errors, check the following:
- Missing rail connectors in the displayed section
- Misplaced one-way connectors in the displayed section
- Wrongly ordered platforms in the route
- Wrongly ordered routes in the depot instructions
- If there are no errors, trains will be deployed from your depot according to your schedule
- If you would not like to wait for the trains to go through your line, you may use the
Instant Deploybutton. - If you would like to clear all your trains, click the
Clear Vehiclesbutton
Board your train using one of the doors. Enjoy the ride; your first railway is complete!
 A door opening in an MPL 16 train. Players may now enjoy the ride!
Transport System Map
To open the transport system map, go to your dashboard and click the Transport System Map button. Your system map will open in your default browser. Only routes going to at least 2 stations will show on the system map.
Notes
- Each route must have at least two platforms, or else no trains will spawn.
- More than one route may be added to the train instructions.
- The siding must be connected (with rails) to the first platform of the first route and the last platform of the last route.
- The
Refresh Pathbutton must be clicked every time the train instructions or rails have been modified.
- Trains will momentarily stop at each platform. This is normal.
- The train with minecarts is not actually made up of real minecarts from the vanilla Minecraft game. In fact, placing in a vanilla minecart manually on the rails won't interact with the routes or schedules at all.
- The length of the train that will spawn is limited by the length of the siding.
- If the platform is too short to spawn even one carriage, no trains will appear!
- See the Trains or the railway dashboard page for the length of each train.
Still need help?
Join our Discord !